Drawing eyes is one of the most powerful ways to bring life to your art. Whether you’re sketching a face or practicing anatomy, mastering the eye helps you improve proportions, shading, and expression.
In this guide, you’ll learn how to draw a realistic eye step by step using only pencil and paper.
✏️ Materials You’ll Need
- HB, 2B and 4B pencils
- Blending stump or cotton swab
- Eraser (kneaded or precision)
- Smooth drawing paper
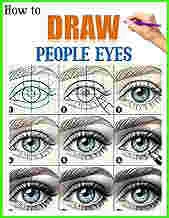
👁️ Step-by-Step Guide to Drawing an Eye
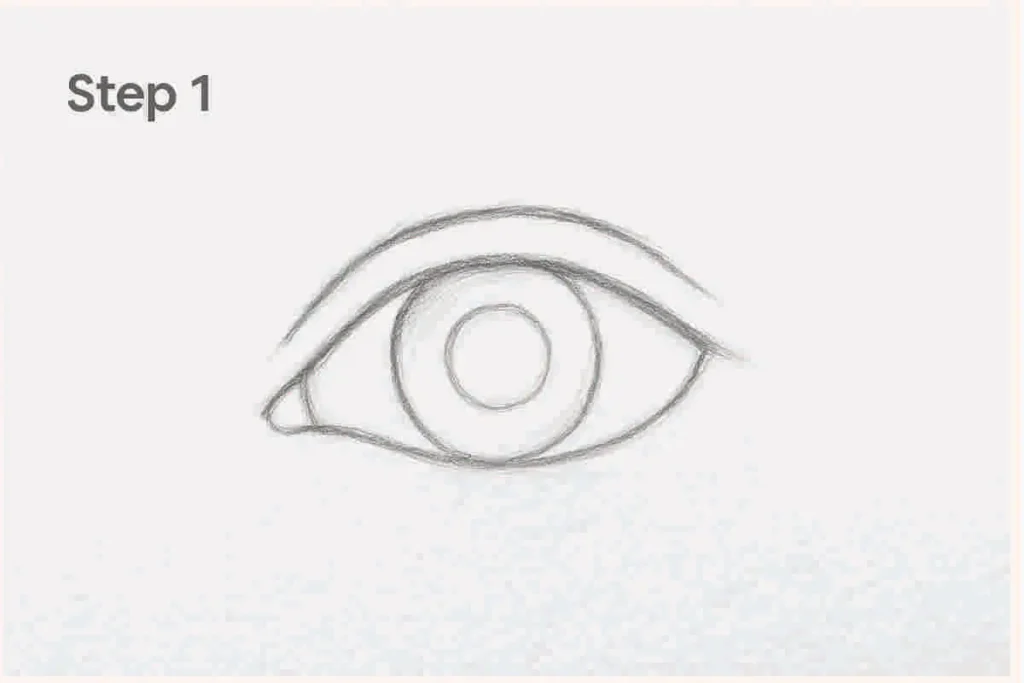
Step 1: Draw the Eye Outline
Start by sketching a horizontal almond shape. This will be the general outline of the eye. Add a circle inside for the iris.
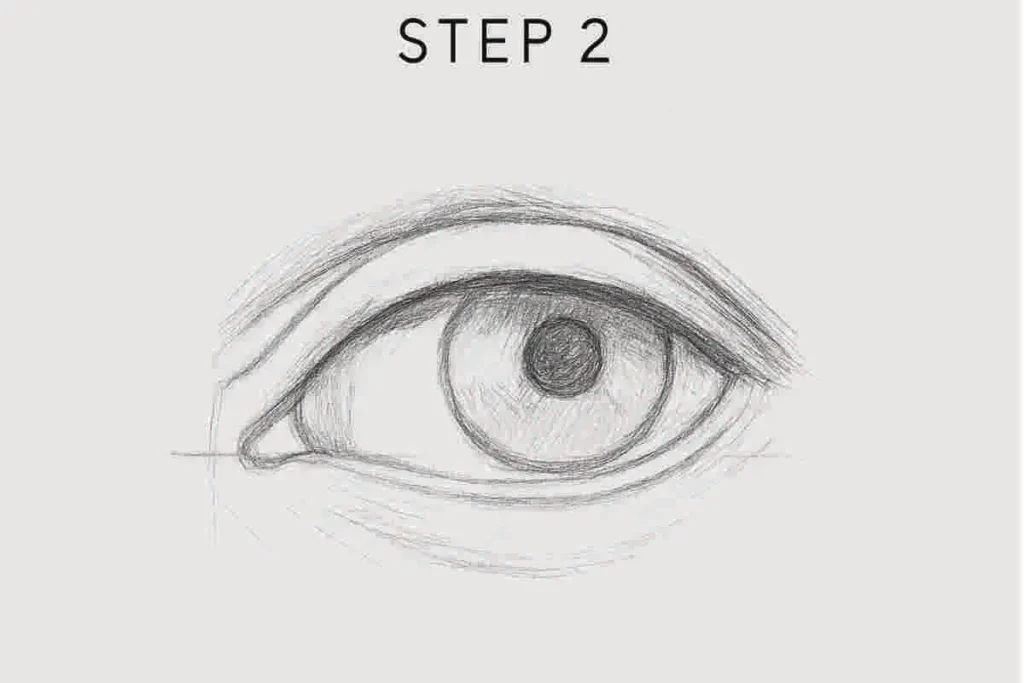
Step 2: Sketch the Eyelids and Tear Duct
Draw the upper and lower eyelids, curving naturally around the eye. Add a small teardrop shape on the inside for the tear duct.
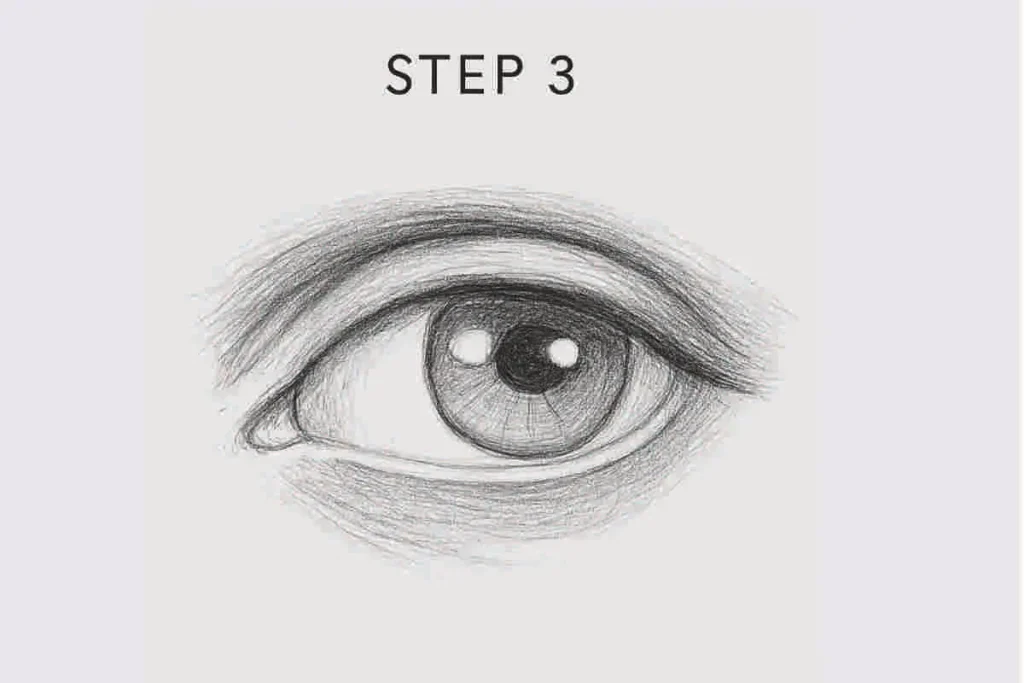
Step 3: Add the Pupil and Light Reflection
Inside the iris, draw a dark circle for the pupil. Add one or two small circles left blank (white) to simulate the reflection of light.
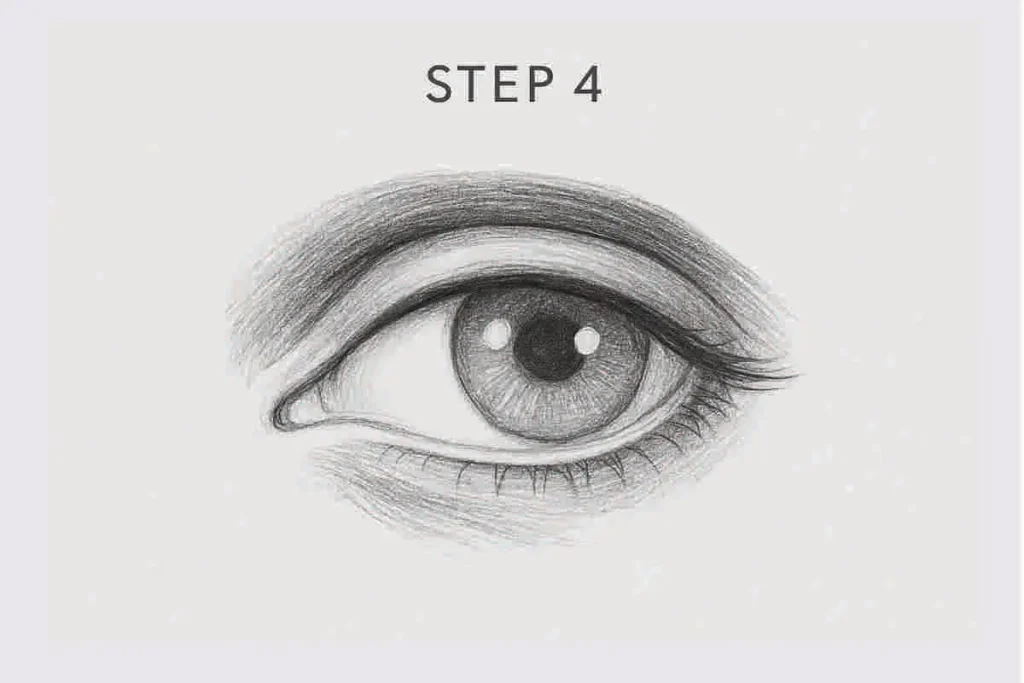
Step 4: Define the Eyelashes and Eyeball Curve
Add light lines for the eyelid crease and a few curved lines extending from the eyelids to begin forming the lashes. Curve the lower lid gently for a more realistic look.
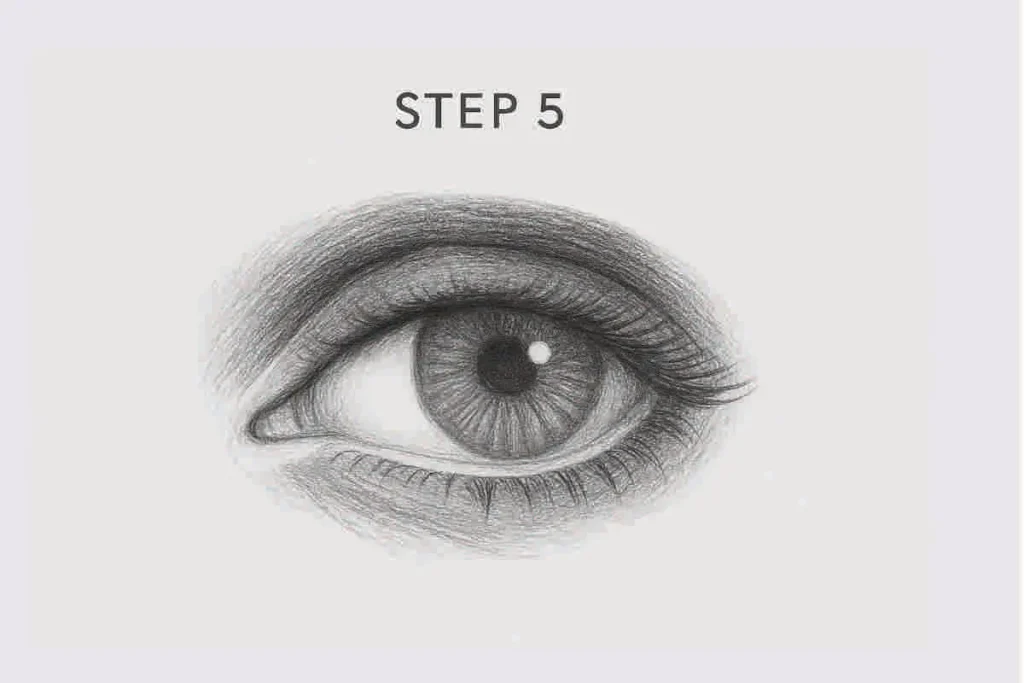
Step 5: Shade the Iris and Add Texture
Use circular strokes to shade the iris, leaving the reflection area white. Darken the pupil and add radial lines outward to suggest depth.
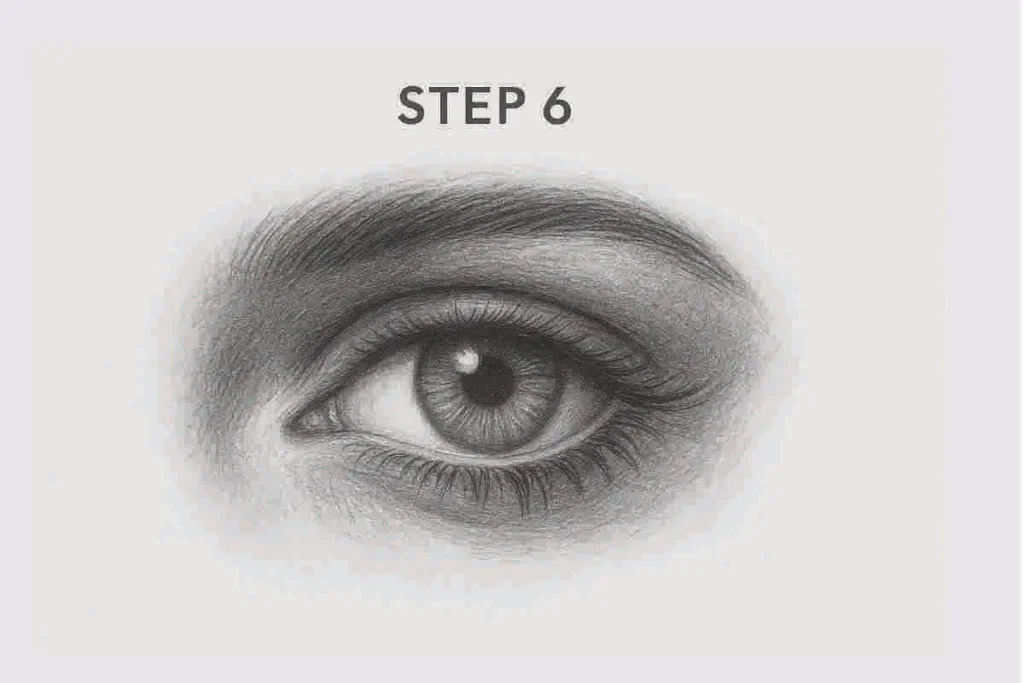
Step 6: Final Shading and Eyelashes
Add shading around the eyeball, under the eyelid, and above the lash line. Define the eyelashes with curved flicks of the pencil. Soften shadows with blending if desired.
🧠 Tips for Drawing Realistic Eyes
- Always leave a highlight spot to show reflection—it adds life
- Eyelashes aren’t straight lines—they curve and vary in thickness
- The upper eyelid casts a shadow over the eye
- Don’t over-outline the white of the eye—shade lightly instead
🎯 Final Result
With practice, you’ll be able to draw expressive and realistic eyes. Try sketching different eye shapes, angles, or emotions to expand your skills.